Pages

Monday, March 4, 2013

This Old (New) House

house

My family and I just moved into what we consider our ‘dream’ home!  Of course, there are a few minor details we would change if we could, but overall, we absolutely LOVE our new home!  

My husband had been looking at homes online for years…no joke, and I have been telling him that there was no we were moving.  I was extremely happy in our home. Yes, it was small and needed some work, but it had such character! 

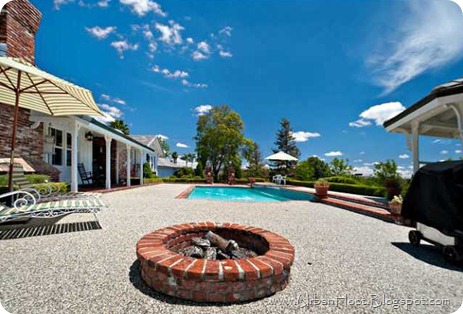
backyard1

Anyway, my husband had a day off in November so he drove me by this ‘house’, off the beaten path, that he had seen online!  It was beautiful!!! 

We called the realtor of the house and she meet us there right away!  I told my husband that we were just looking and that is that!

WELL…I was wrong! 

Sometimes it’s okay to be wrong!

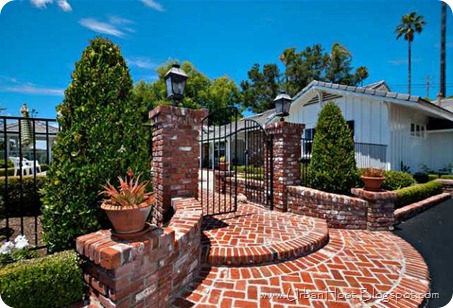
house1

We both fell in love with this 1950’s cottage ranch style home!  The previous owners had taken immaculate care of it and it needed NOOOO work done on it!

house3

The grounds of the house were just amazing! The view and landscaping perfect!

Rocking chairs on the porch!!! SOLD!

house2

After walking around the property, we stepped into the house…and, I just knew it would be ours!

Have you ever had that feeling that you ‘belong’ in a house? That a house was meant to be yours?

house4

One crazy month later, we moved in and have felt like we are truly HOME!

Tuesday, February 19, 2013

That Desk has Balls…Baseballs!


So there is this competition called Creating with the Stars that I am entering.  I have to submit my best ‘project’ that I have made, but, since I have soooo many awesome ones, I knew that I would need some advice as to which one to submit.  After I asked some friends what they thought, I brought up the question to my husband and my 8 year old son.  My son looked at me and said, “Mom, the best thing you have ever made came from your belly…ME!”  How stinking true is that!?! No matter what I have made or will make he is by far the best thing and I can in no way top that!  So, with him in mind, I decided to submit him and his baseball desk, that I made this summer (I made the desk this summer not him)! 

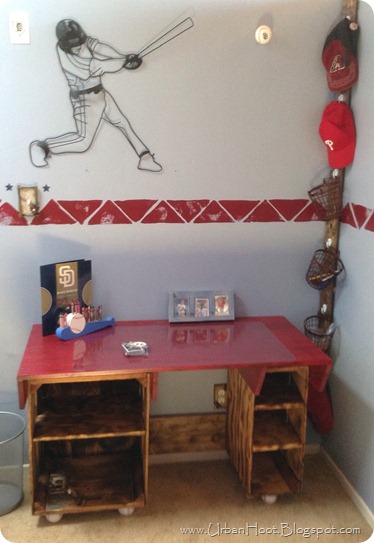
We lived in our old house (we just moved last month) for 5 years before I started ‘doing’ my son’s bedroom.  Since he loved sports, especially baseball, I decided it would be a sports themed room.  My son and I worked all summer painting it and redoing his furniture to fit his new themed room.  When it was done I realized that it needed a desk.  Now, I could have gone out and purchased one, but where is the fun in that? 


baseballdesk9

I went back and forth on ideas and still was not quite sure how I wanted to proceed until…I came across these beauties!

baseballdesk11

My local Sprouts was throwing these awesome crates away!  And NO, I am NOT lying!  I couldn’t believe it either!  I scored 20 amazing crates for free!!!!  I don’t think I had been this excited since…well, I am not sure, but you get the point! 

balldesk3

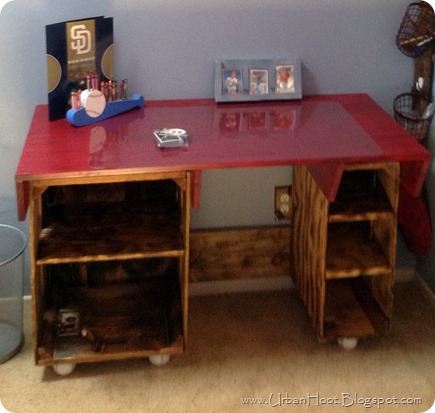
After congratulating myself on repurposing these crates for the base of the desk, I went to work.  First I cut one of the crates in half and then added shelves to each crate.

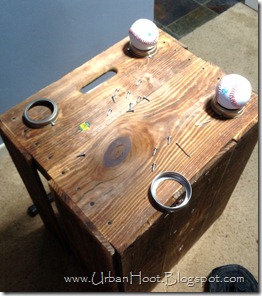
baseballdesk5        baseballdesk4

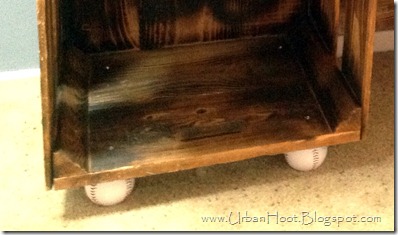
Ok, how creative and cool is the bottom of this desk?  This is by far my favorite part of the desk!  I didn’t want the crates to sit directly on the floor and I needed a little extra height so I added baseballs as the legs!  To keep the balls from moving I attached the rings from mason jar lids to the bottom of each crate and then attached the ball to the crate with screws! 

I did not take pics of the rest of the things I did, cause I did a lot of trial and error and I just didn’t want to have to stop to write down the measurements I used and so forth.


baseballdesk9

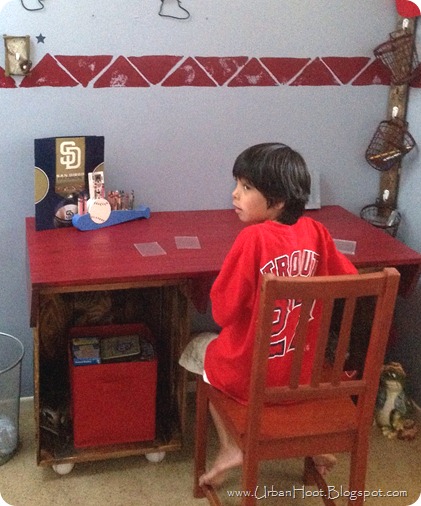
I just love how this desk turned out and how awesome it looked in his sports themed room! But, don’t worry, I brought the desk with us and it is now in his new bedroom!

baseballdesk10

Aren’t my 2 top things I have ‘made’ just awesome?   I totally hit a home run with this desk!  Yes, I did just write that! 

Wish me luck in the competition!  Thanks!

Linking up:

Savvy Southern Style

The Shabby Creek Cottage

SNAP

Whipperberry


Home Stories A2Z


The 36th AVENUE
Catch a Glimpse Button

Photobucket

52 Mantels

Weekend Bloggy Reading

 Furniture Feature Fridays

Photobucket


Blissful and Domestic


I Heart Nap Time

Wednesday, February 13, 2013

Chocolate Flowers…Yummy!


  chocolate flowers3

Who loves chocolate?  Who loves flowers?  Right!  Every woman loves both!  So, chocolate flowers are perfect in every way!  Combine 2 awesome things and get something even awesomer (yes, I know that is not a word, but it totally should be)!

As I was looking on Pinterest (every hear of it? haha) for a Valentine’s Day gift for my son’s teacher I came across an adorable Hershey Kiss Flower Bouquet from All In One Day’s Time and decided that I had to make it!  


cf

If you are a crafter, who loves chocolate, then you probably already have all the supplies you need at home to make this yummy bouquet!

  • Scraps of fabric – cut into 4x4 squares
  • Floral tape
  • Felt for the leaves
  • Wooden skewers
  • Hershey kisses
  • Mason jar (not pictured)
  • Sticky stuff (not pictured)
  • Rice (not pictured)
  • Jute (not pictured)
  • Toilet paper roll – the inside part (not pictured)
  • And of course scissors and a ruler

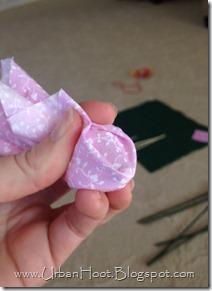
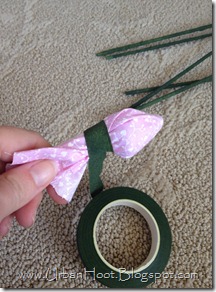
cf1       cf2       cf3

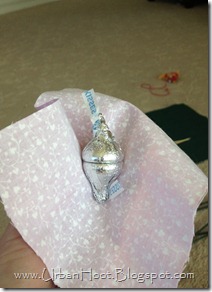
After you cut your fabric into 4x4 squares, place 2 kisses bottom to bottom, then hold your fabric over to create the flower bud.  Then stick your skewer in the fabric near the bottom kiss, and start to wrap your floral tape where the kiss starts to taper.  Wrap your floral tape all the way to the bottom of the skewer.  Easy peasy!  Do as many flowers as you like! The more the merrier though!

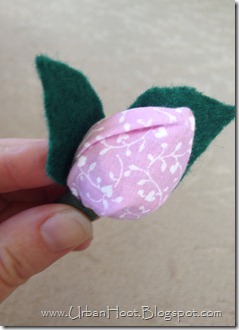
cf4            cf5

Now it is time to cut your leaves out of your felt.  Please, do NOT look closely at my leaves!!!  For some reason I am a horrible leaf cutter!  Or maybe it is cause I can never cut felt that great?  Anyone else have that problem…or is it just me?  Hmmm???   So after you have your leave cut (hopefully better than mine), take your leaves and attach them to the bud with more of your floral tape. For some flowers I used 1 leaf, but mostly I used 2 leaves to give the bouquet a fuller look. 
cf6

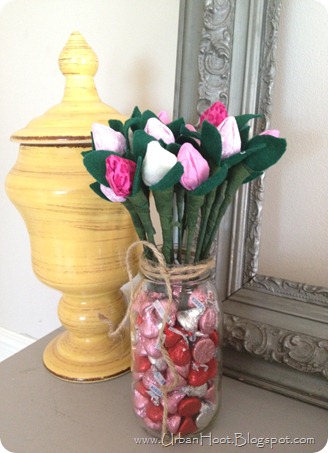
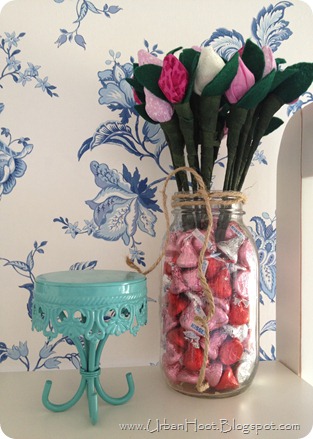
Now, you can either stop there and make a handheld bouquet, or you can put them into a vase, or a mason jar as I did! 

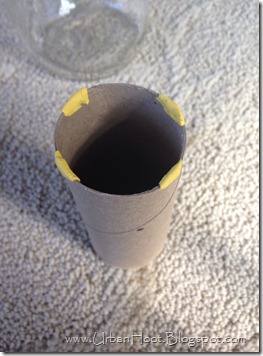
If you want to put them into a mason jar, go find yourself the paper middle of a toilet paper roll.  Luckily, I had just changed my roll…TMI?  Anyway, once you have that put some tacky/sticky stuff to the bottom of the roll so that it stays in the middle of your mason jar.  Once it is in your mason jar, fill the outside part with the rest of your Hershey kisses.  I actually used 2 bags for the whole project, and I didn’t even eat any as I made this!  What is wrong with me?  Next pour a little rice into the roll and start arranging your flowers in the middle of the toilet paper roll.  If you need more height like I did, put some crumpled up paper towels on the bottom before you add the rice.  Once you are done, you can tie some fabric, ribbon or jute, like I did, for that finishing touch. 
chocolate flowers7


chocolate flowers1

chocolate flowers6

I just loved how these turned out!  My son’s teacher is going to go crazy over them.  She can enjoy the flowers, while eating the chocolate from the mason jars, and won’t even have to ruin the flowers!

Happy Valentine’s Day!!!

Linking up to these fabulous parties!


Savvy Southern Style

The Shabby Creek Cottage

CraftyScrappyHappy

WhipperBerry


   Home Stories A2Z
Catch a Glimpse Button    Visit thecsiproject.com

Beyond The Picket Fence   The 36th AVENUE

Serenity Now blog
The Answer Is Chocolate